
If you want a magnificent mane on your wedding day you should start preparing your hair about 6-8 months in advance following these 12 tips to prepare your hair for your wedding that I frequently offer to clients and friends. This simple and definitive list highlights what I consider to be my best and most practical tips for haircare based on my experience as a hairstylist and bridal beauty professional.
And now on to the Dos & Don’ts of Preparing Your Hair for Your Wedding!
DO:
Talk to your hairstylist and form a realistic goal for your ideal wedding day hair. If you have bounced around a lot and don’t have a regular stylist, ask a friend who looks fabulous and whose style and level of maintenance align with yours for a recommendation.
DO:
Start preparing for some change if you have been taking poor care of your hair. We’re beauticians, not magicians! It may be time to let go of some of your length if there is damage from thermal styling, chemical processing, or just regular wear and tear. If you have and like your long hair or are change averse this doesn’t mean you have to go for a big scary chop, but it does mean that you need to start taking steps to correct and prevent further damage.
DON’T:
The scant months leading up to your wedding are not the time for extreme changes to your hair. Now is not the time to go platinum blonde for the first time, dye your hair punk black number 1, or opt for the trendy crop cut you admired in a magazine last week at the nail salon. On your wedding day you want to look and feel like yourself, only more polished and formal. Trends come and go, but those photos are forever; don’t do anything crazy!
DO:
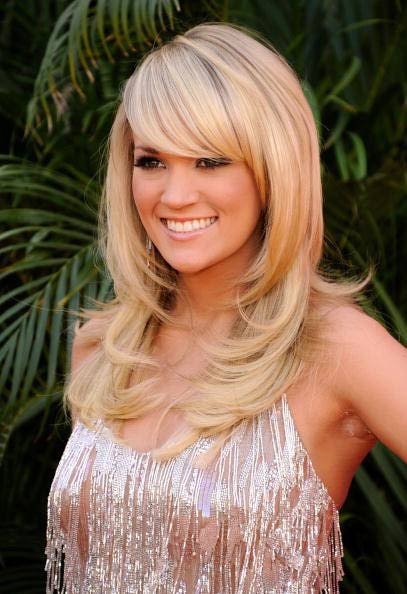
Change things up a little if you’re feeling blah or you want to amp up your look. Adding face framing layers and/or a sideswept bang can make a world of difference without moving you too far outside of your comfort zone. I especially recommend layering for brides with thick or heavy hair that is uniform length or has very little existing layering to add body and bounce by removing bulk and weight. Browse online for looks that showcase soft, modern looks and bring a picture to your next hair appointment. For most face shapes, side bangs should hit to about your browbone or cheekbone–any shorter and they’re not really a side bang, any longer and it’s not a bang it’s a face frame.
If you’re REALLY scared of change, try a temporary change with clip in fringe or use a virtual makeover app like the one from InStyle (which I personally used to try out my edgy crop before I undertook the actual chop) to ease in to the new look.
DO:
Invest in quality hair care products from sulfate free shampoo & conditioner that are suitable for your hair type/texture and switch to no/low silicone heat protectant if you blow dry or flat iron your hair frequently (I’ll explain why later). You can get away with scrimping on other beauty items by making your own body scrubs at home or using coconut oil as moisturizer and makeup remover, but if you abuse your hair with harsh detergents and crappy ingredients, it will not do you any favors on your wedding day or any other day.
DON’T:
Do not douse your hair in shine/gloss/finishing/heat styling serums loaded with silicones thinking it’s helping to mend your split ends and chemical damage because when you use it your hair looks so shiny and healthy. Silicones (-cones) are used in a multitude of beauty products from makeup primers to foundations and hair care products because it is non water soluble and is highly effective at masking a multitude of issues. On skin, it sits on the surface and creates a blurring effect on fine lines and wrinkles and helps prevent product from settling into enlarged pores because the silicone molecule is larger than the human pore.
On hair, silicone polymers lock out frizz causing moisture by coating and smoothing the cuticle of the hair shaft, which is actually made up of tiny overlapping scales that become raised and can make hair look dull and feel rough. The problem is that since -cones are non water soluble, they build up on the hair and block vital moisture from conditioners and oils from reaching the hair shaft, making dry hair even drier with long term use!
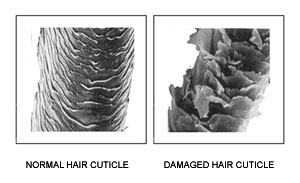
Many heat styling protectants are -cone heavy and they do more harm than good for because these products do allow some water to escape the hair shaft as steam. The heat of the escaping steam can literally be extreme enough to melt the overlapping scales of protein that comprise the cuticle and fuse these scales together making the strand stiff and brittle. Try more natural options like argan oil that won’t wreck havoc on your hair.
DO:
Use the lowest possible heat setting. When you apply high temperatures plus the friction of using a brush and blower or a flat iron with frequency, you are damaging your hair to varying degrees. When it comes to the question of which is “better” for you, blow drying or flat ironing: blow drying is like opening a hot oven and sticking your hand into the middle whereas flat ironing is like opening the hot oven and planting your hand on the bottom. Get the picture? If you must heat style, the less damaging option is blow drying in sections on medium to low heat with a natural bristle/wooden barrel or quality ceramic brush using a light application of natural oils to protect your hair.
DO:
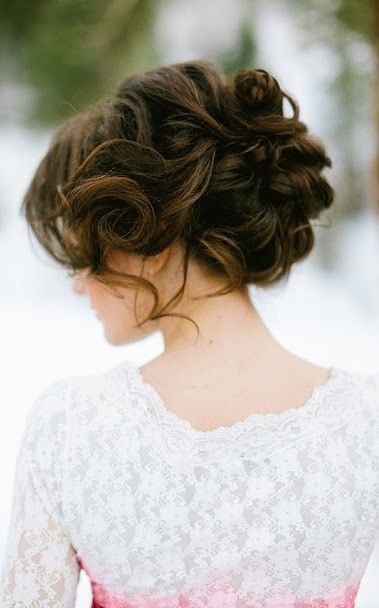
Get subtle appropriately toned highlights to give your desired style texture, movement, and visual interest especially if you have dark hair. Observe below:
I did the updo on the left, so I know exactly how intricate the design was and in person it was *stunning*. But my client’s hair was so dark that a lot of the detail gets lost in the photographs. Ever notice how most of the popular images of hairstyles on Pinterest feature blondes or brunettes with highlights?

DON’T:
Do not be afraid of padding, clip in extensions, foam donuts, or any other foreign and non permanent measure suggested by your bridal stylist if you need a little help filling out your desired style. No, people can’t tell. Yes, it will come off easily, we will show you how to remove any additions and how to take out your hair style without yanking out your hair. You’d be amazed how often you’re seeing styles in the media every day that incorporate these styling aids and you don’t even know it.
DO:
Do your proper maintenance and preparation and you shouldn’t need to cut large amounts of hair off each cut leading up to the wedding day. Once you reach your desired length get micro trims or “dustings” every 6-8 weeks to remove damage, and schedule your last trim 3-4 weeks before the wedding so that your hair has sufficient time to grow in a little bit and soften the very blunted ends that come with a fresh cut.
DO:
Schedule your last color appointment before the wedding 2.5 weeks in advance depending on how fast your hair grows.
DON’T:
For the health of your hair and skin as well as your sanity, please don’t crash diet. Crash diets don’t work and”cleanses” are polite and socially acceptable ways of starving yourself while maintaining the appearance of “health”. These extreme diets with severe caloric restrictions and unbalanced food choices are depriving your body of the nutrients it needs to perform vital functions such as processing toxins and regenerating cells and tissues, aka clearing your skin and creating new skin, hair, and nails. Eat healthy, well balanced meals and if you feel like you need an extra boost, talk to your doctor or a nutritionist* and consider taking supplements such as prenatal vitamins, biotin, horsetail (silica, which also helps harden weak bones and teeth) or Omega 3s & 7s.
*If you are on any kind of medication or managing a long term condition or nursing or pregnant, please consult with your physician before you start any supplement regimen of extra vitamins or herbs as some may have interactions with medications or cause complications with pregnancy.